Mount the NFS server to the Application Server
Now that the “on-premises” infrastructure has been deployed. We now need to access the application server in order to mount the NFS server.
1. In the on-premises region. Navigate to CloudFormation.
- Select the stack named:
DataMigrationWorkshop-onPremResources.

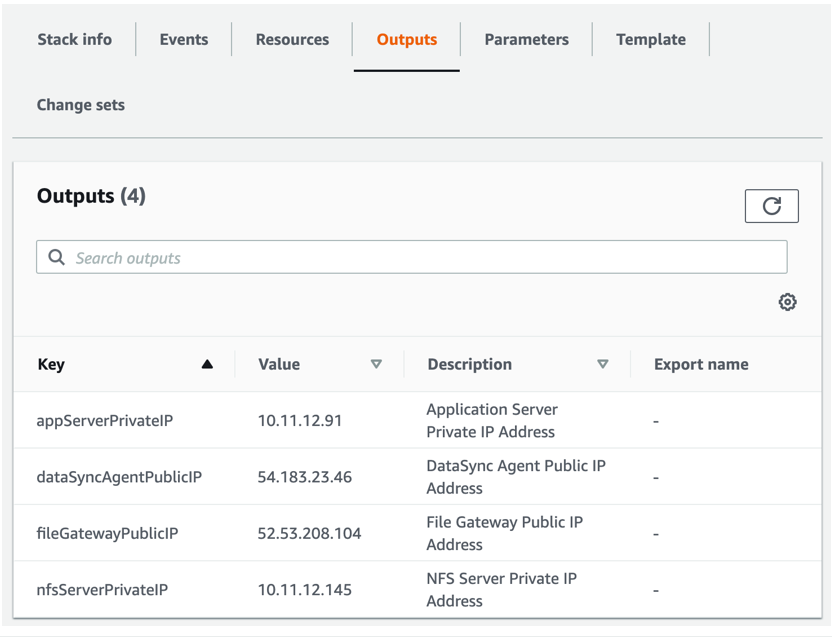
Click on the Outputs tab, as shown in the image below.
You should see four values listed to copy down as these will be needed later:
- appServerPrivateIP – This is the private IP address of the Application Server. You will use this when creating the Storage Gateway file share to limit access to the NFS export.
- dataSyncAgentPublicIP – This is the public IP address of the EC2 instance running the DataSync agent. You will use this when activating the DataSync agent.
- fileGatewayPublicIP – This is the public IP address of the EC2 instance running the File Gateway. You will use this when activating the Storage Gateway.
- nfsServerPrivateIP – This is the private IP address of the NFS server. You will use this both on the Application Server and when creating a location for DataSync.
2. Connect to the Application server.
- From the AWS console in the on-premises region.
- Navigate to EC2.
- Select Instances from the menu on the left.
- Select the box on the ApplicationServer instance.
- Click Connect.

If you configured an EC2 Key Pair when you deployed the on-premises CloudFormation template, then you can connect using an SSH client from your computer:

Otherwise you can connect to the instance directly through your browser using either EC2 Instance Connect or Session Manager:
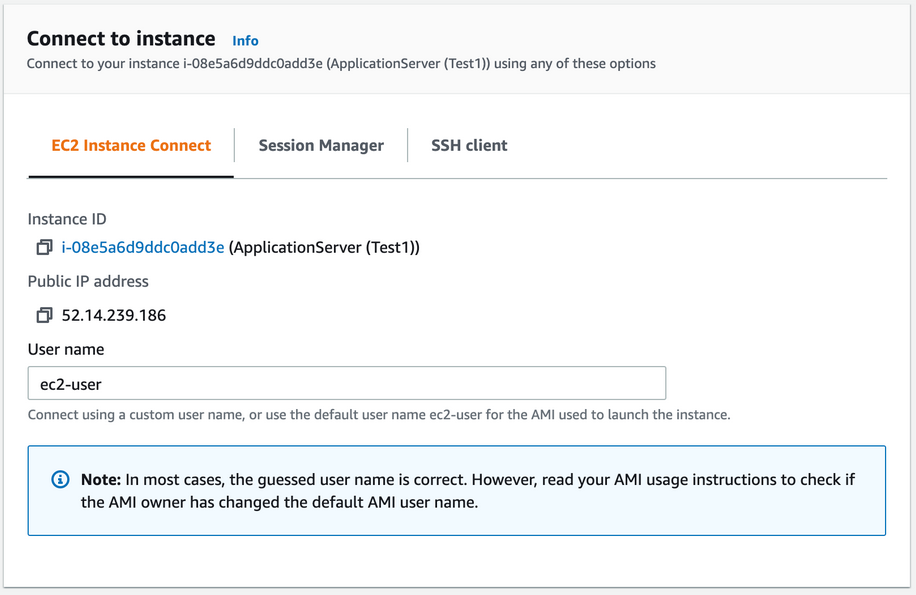
If using EC2 Instance Connect or Session Manager, click Connect. A new tab will be opened in your browser with a command line interface (CLI) to the Application server. Keep this tab open - you will use the command line on the Application server throughout this workshop.
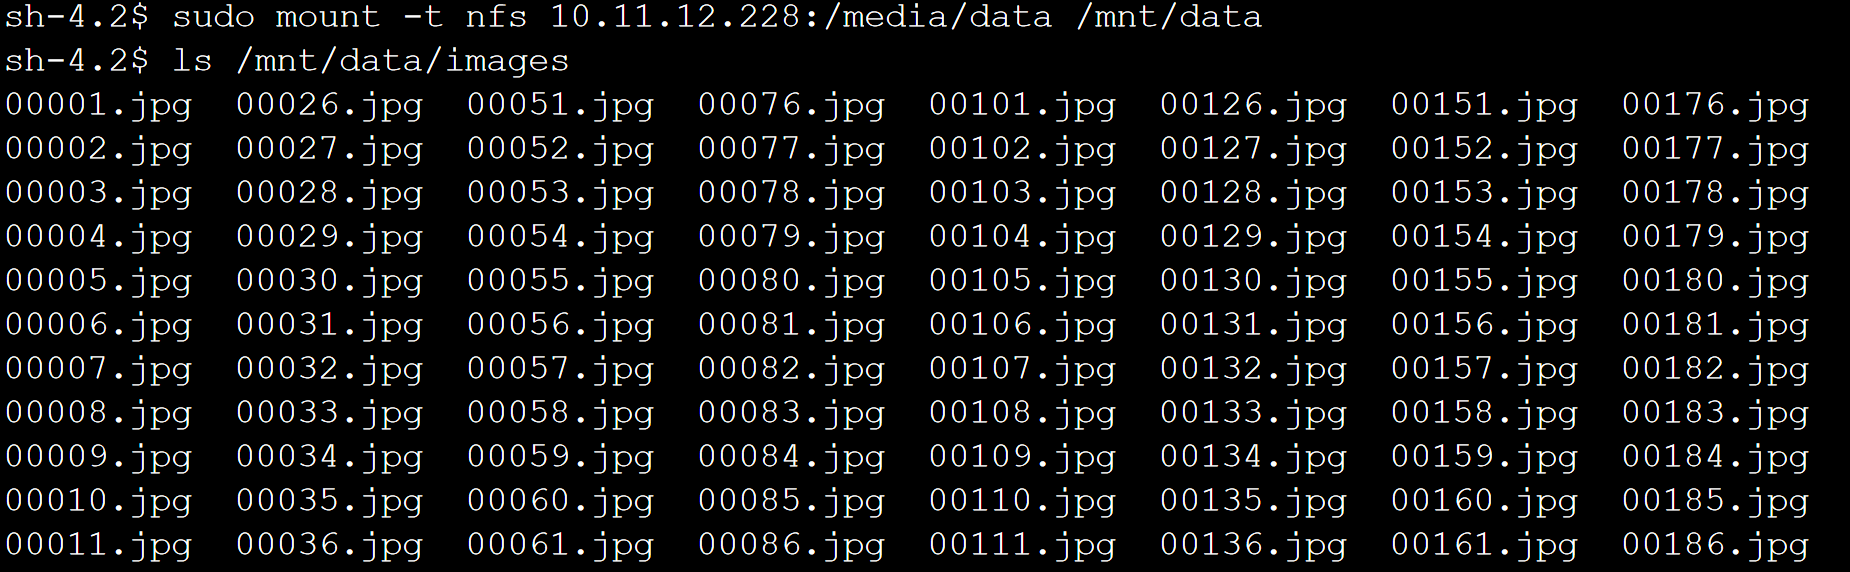
3. Mount and Validate.
In the CLI for the Application server, run the following commands to mount the NFS export and verify the files on the NFS server.
Use the nfsServerPrivateIP value from the on-premises CloudFormation stack output.
$ sudo mount -t nfs <nfs-server-ip-address>:/media/data /mnt/data
$ sudo wget https://secure.eicar.org/eicar.com.txt
$ sudo cp eicar.com.txt /mnt/data/eicar.txt
$ ls /mnt/data/images
In the /mnt/data/images folder are 200 image files, as shown below. These image files represent the NFS server data that will be migrated to the S3 bucket in the in-cloud region.
Amazing, you have deployed all of the resources necessary in both the on-premises region and the in-cloud region. You have also mounted the NFS export on the Application server and verified your data set. 🚀