Deploy File Storage Security
Cloud One - File Storage Security Deployment
Let’s deploy Cloud One - File Storage Security to our AWS Account.
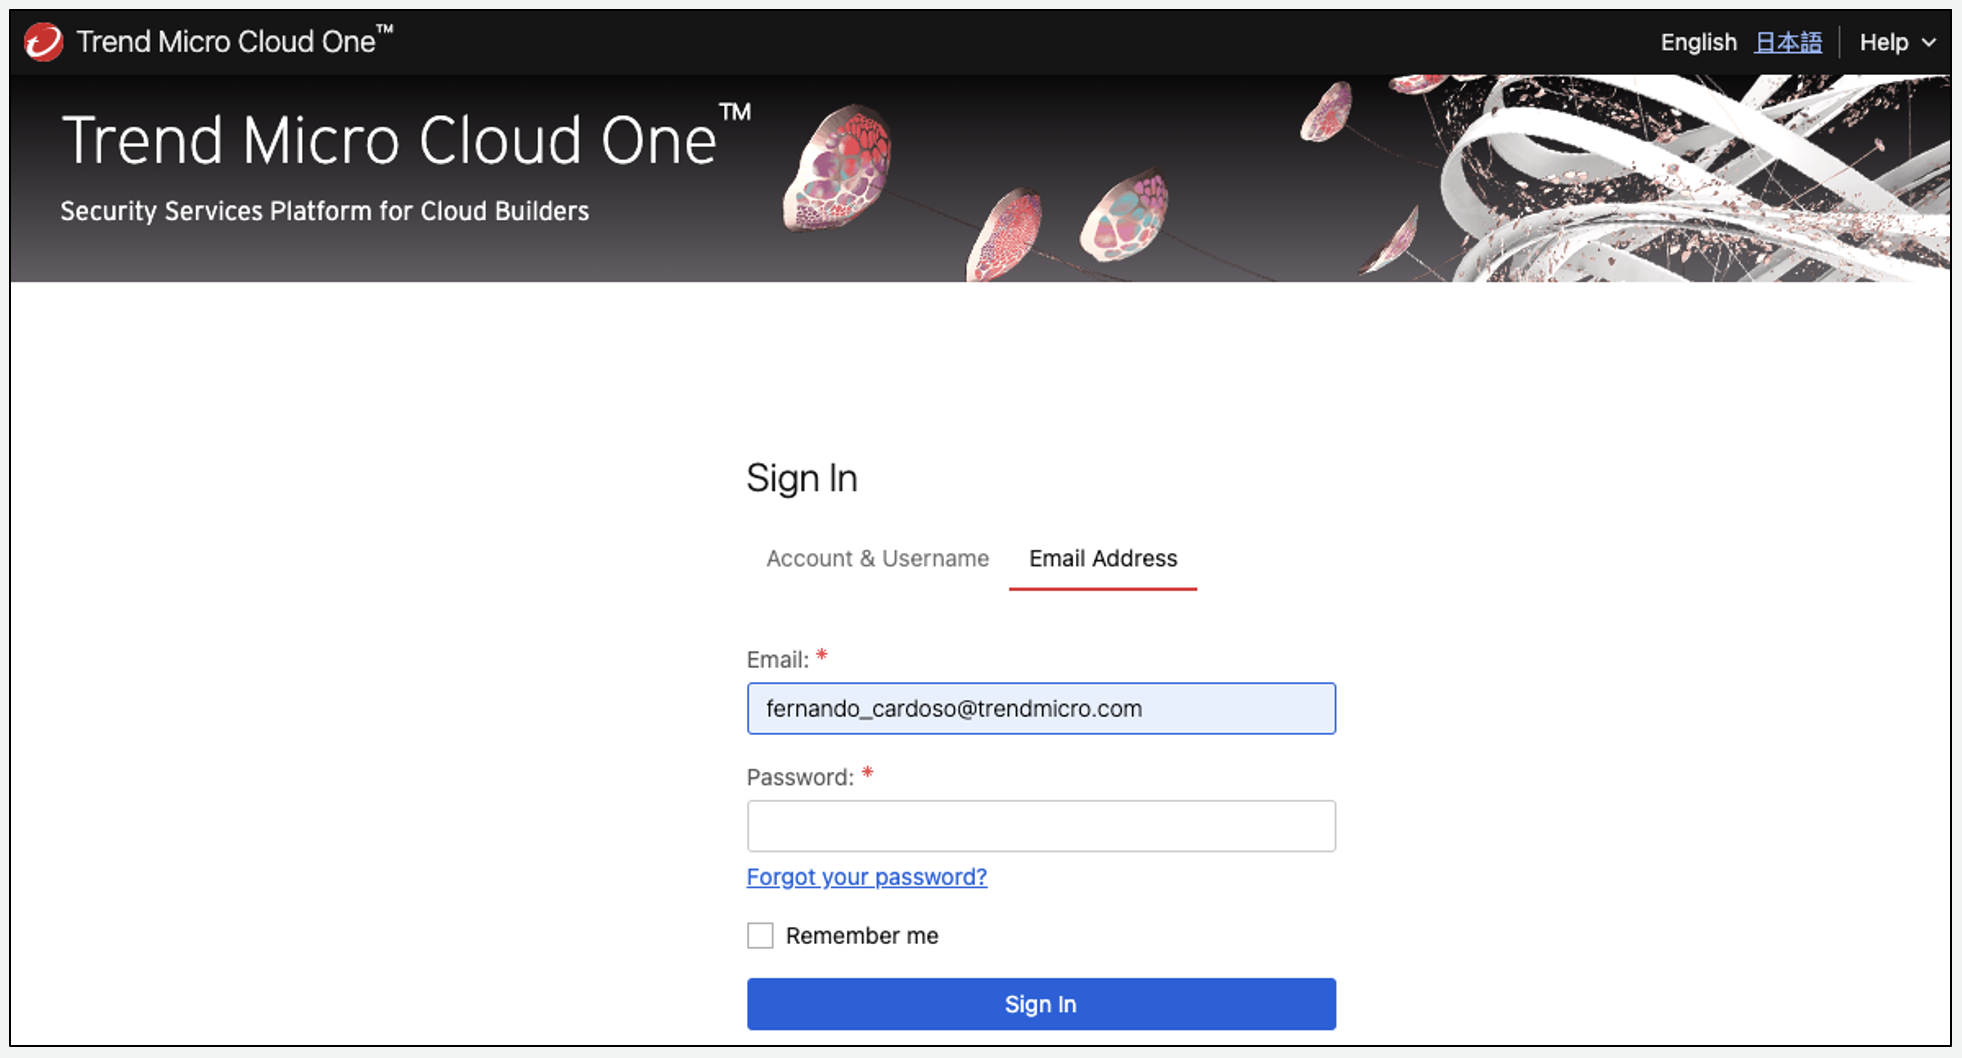
1. Login to the Cloud One platform. It will request your login information. If you don’t have it, check the requirements page that has all the details that you will need to create your account.
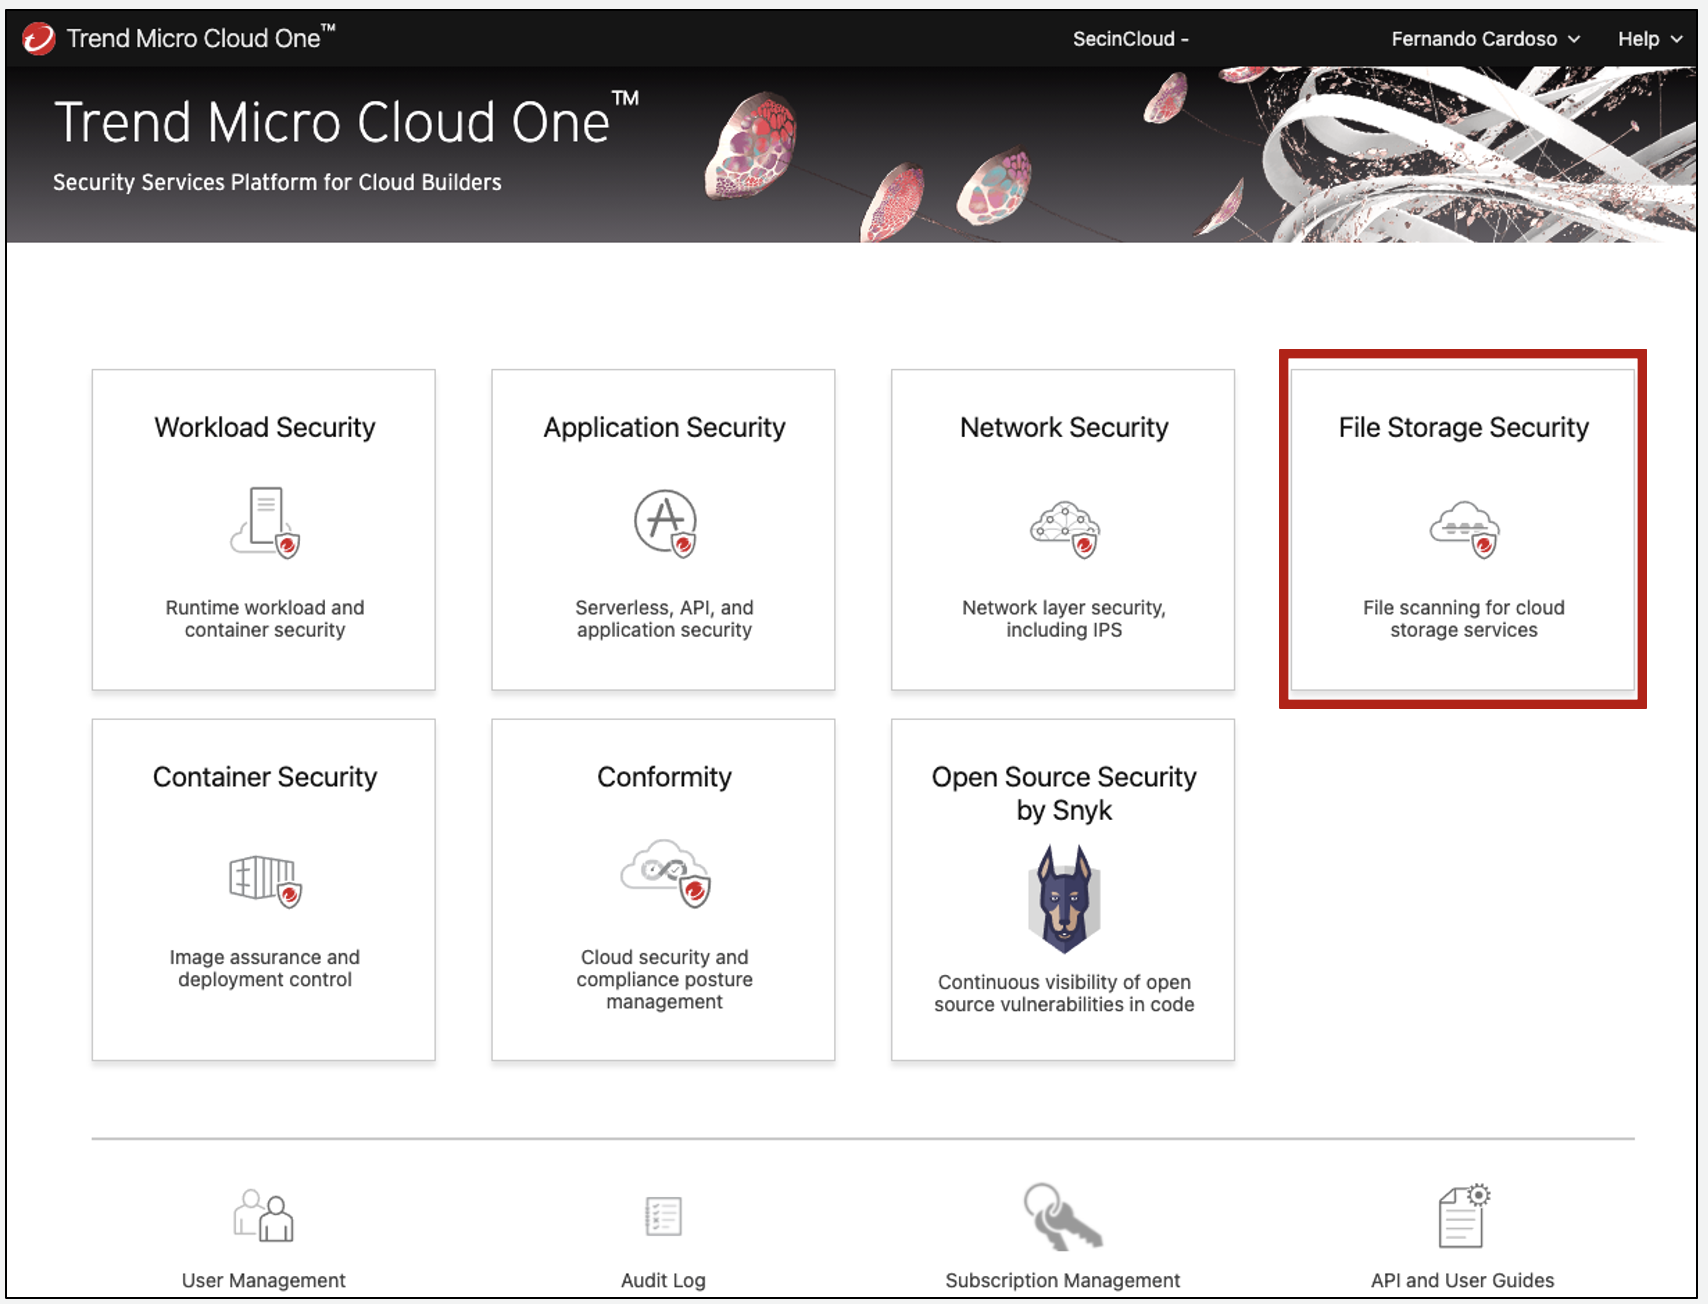
2. Select the File Storage Security tile
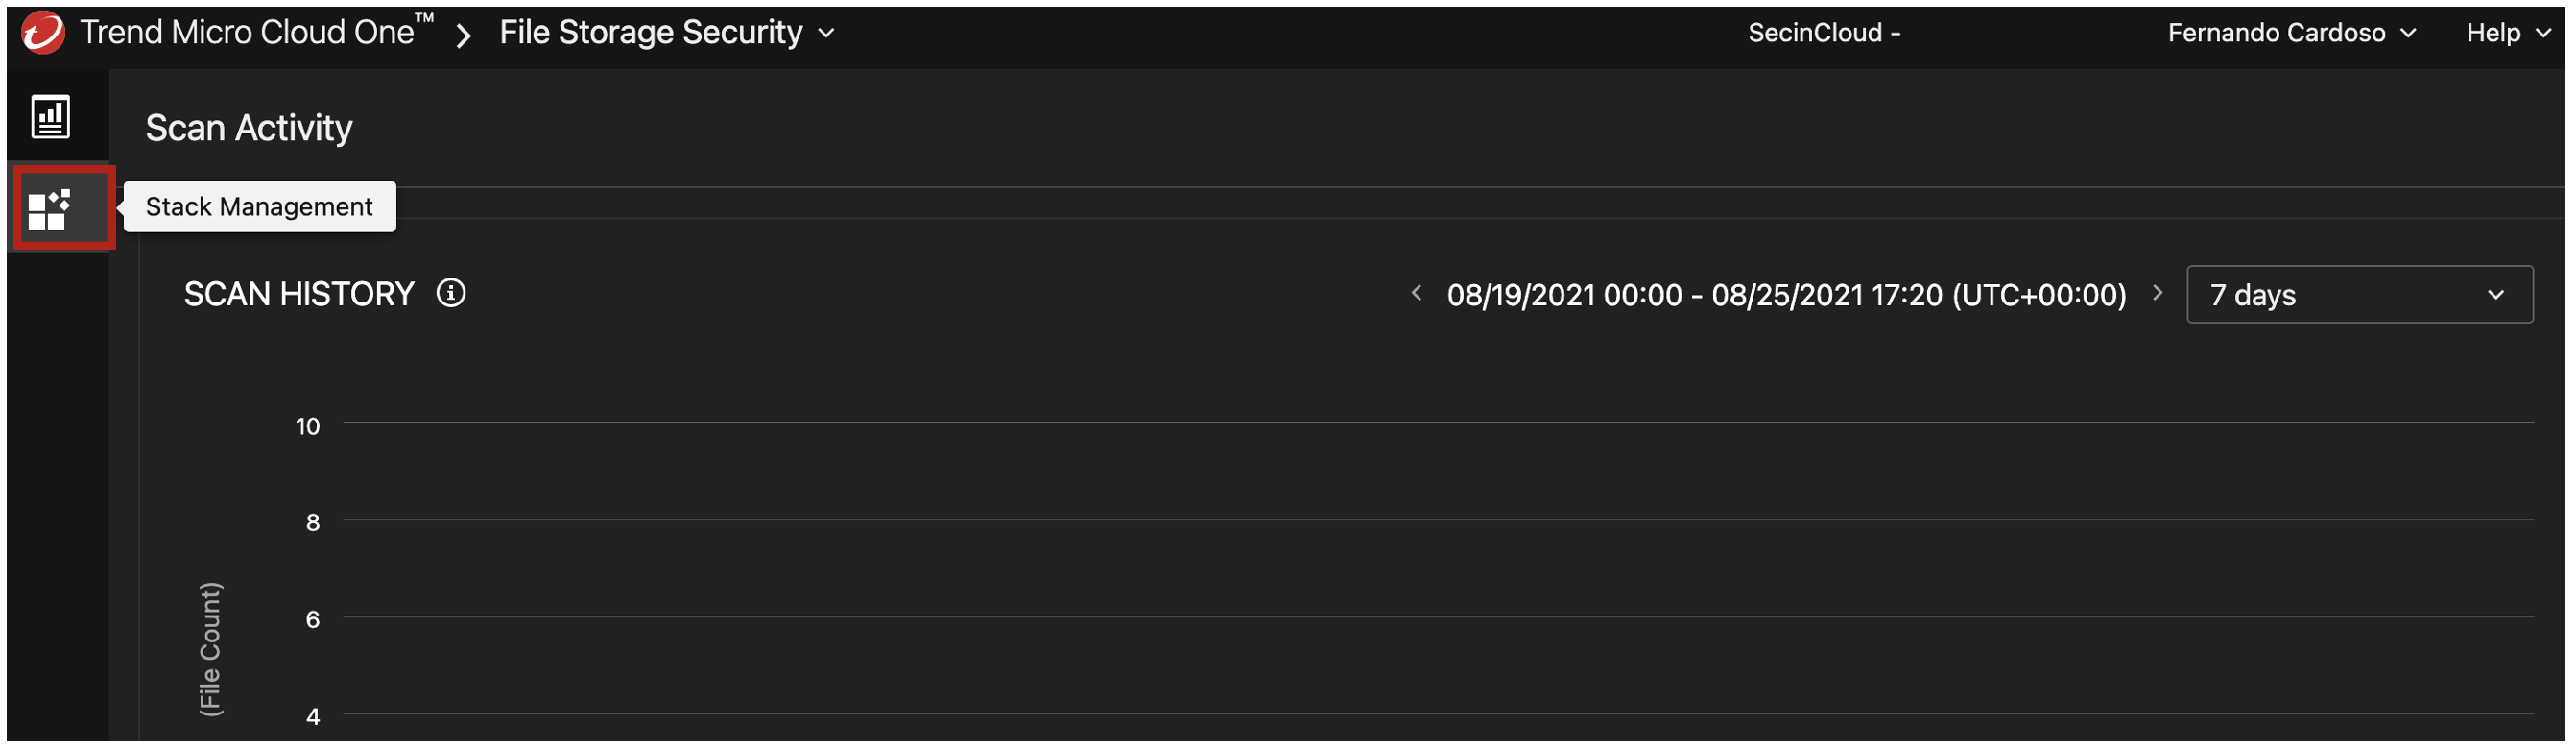
3. Click on Stack management on the left side
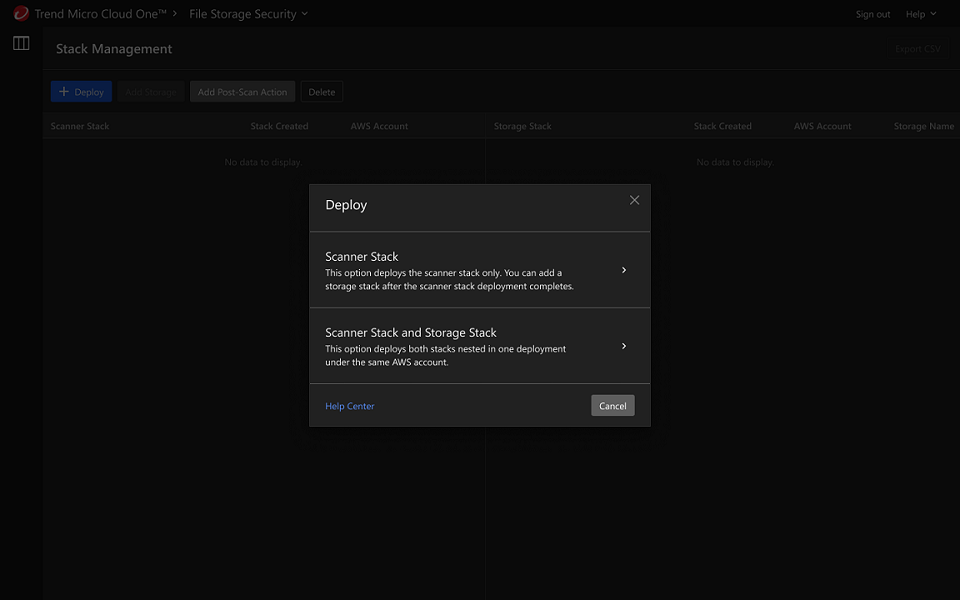
4. Click on Deploy
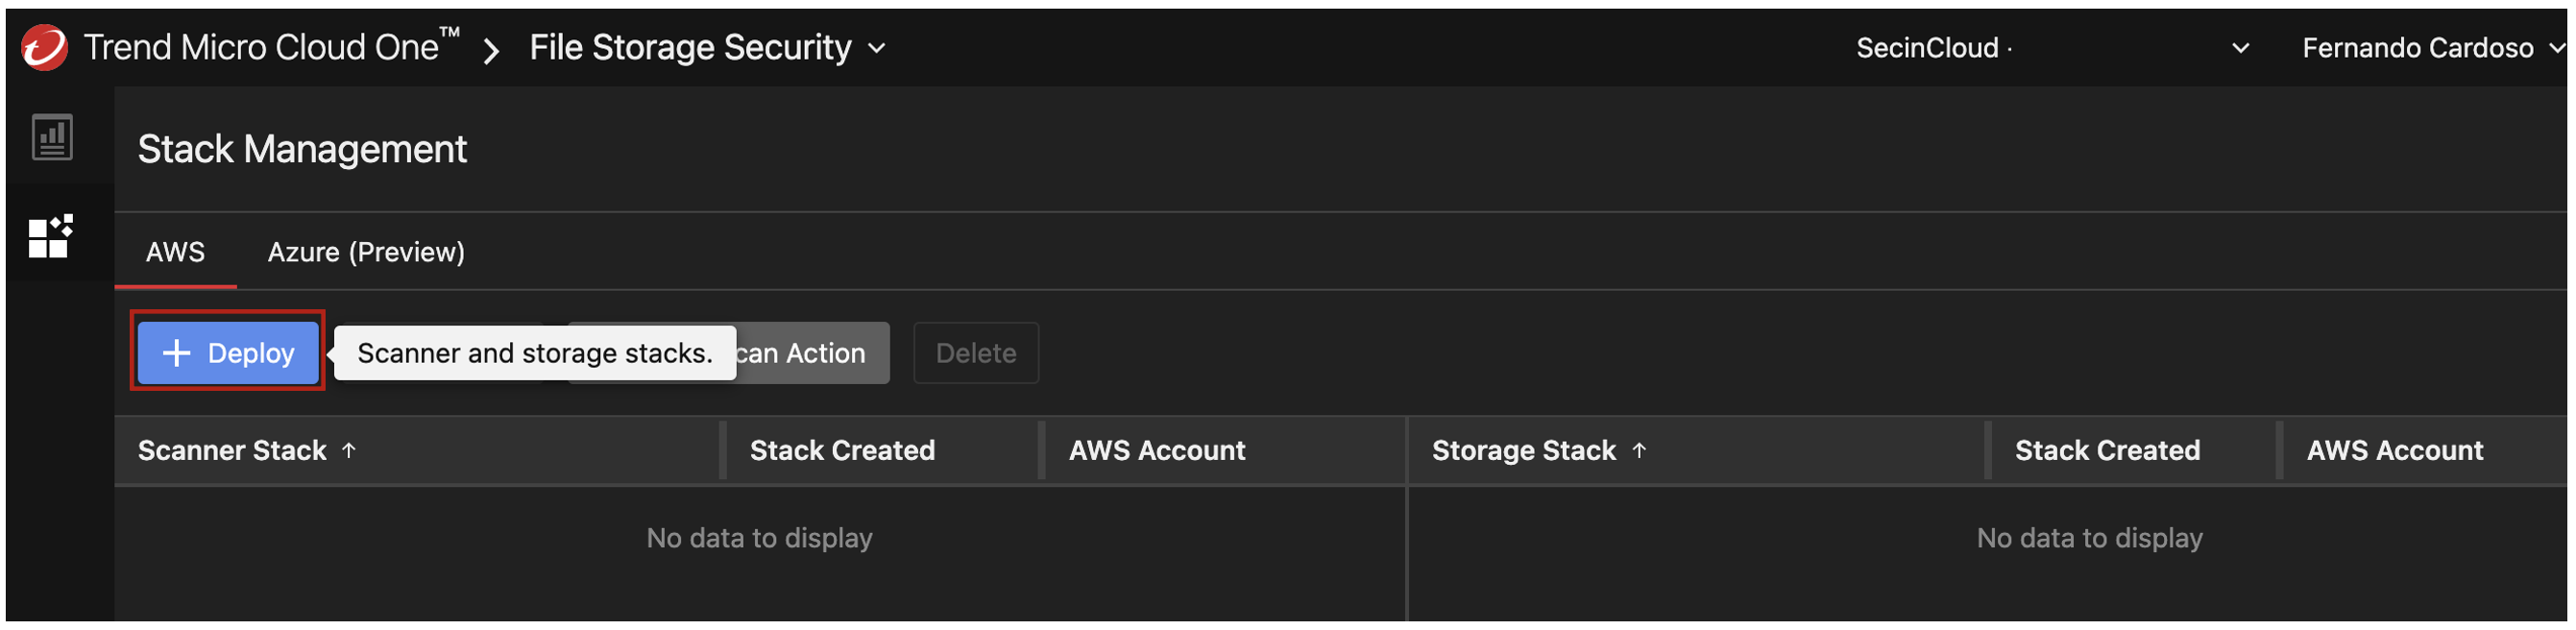
5. Select the Scanner Stack and Storage Stack, to deploy to your AWS account.
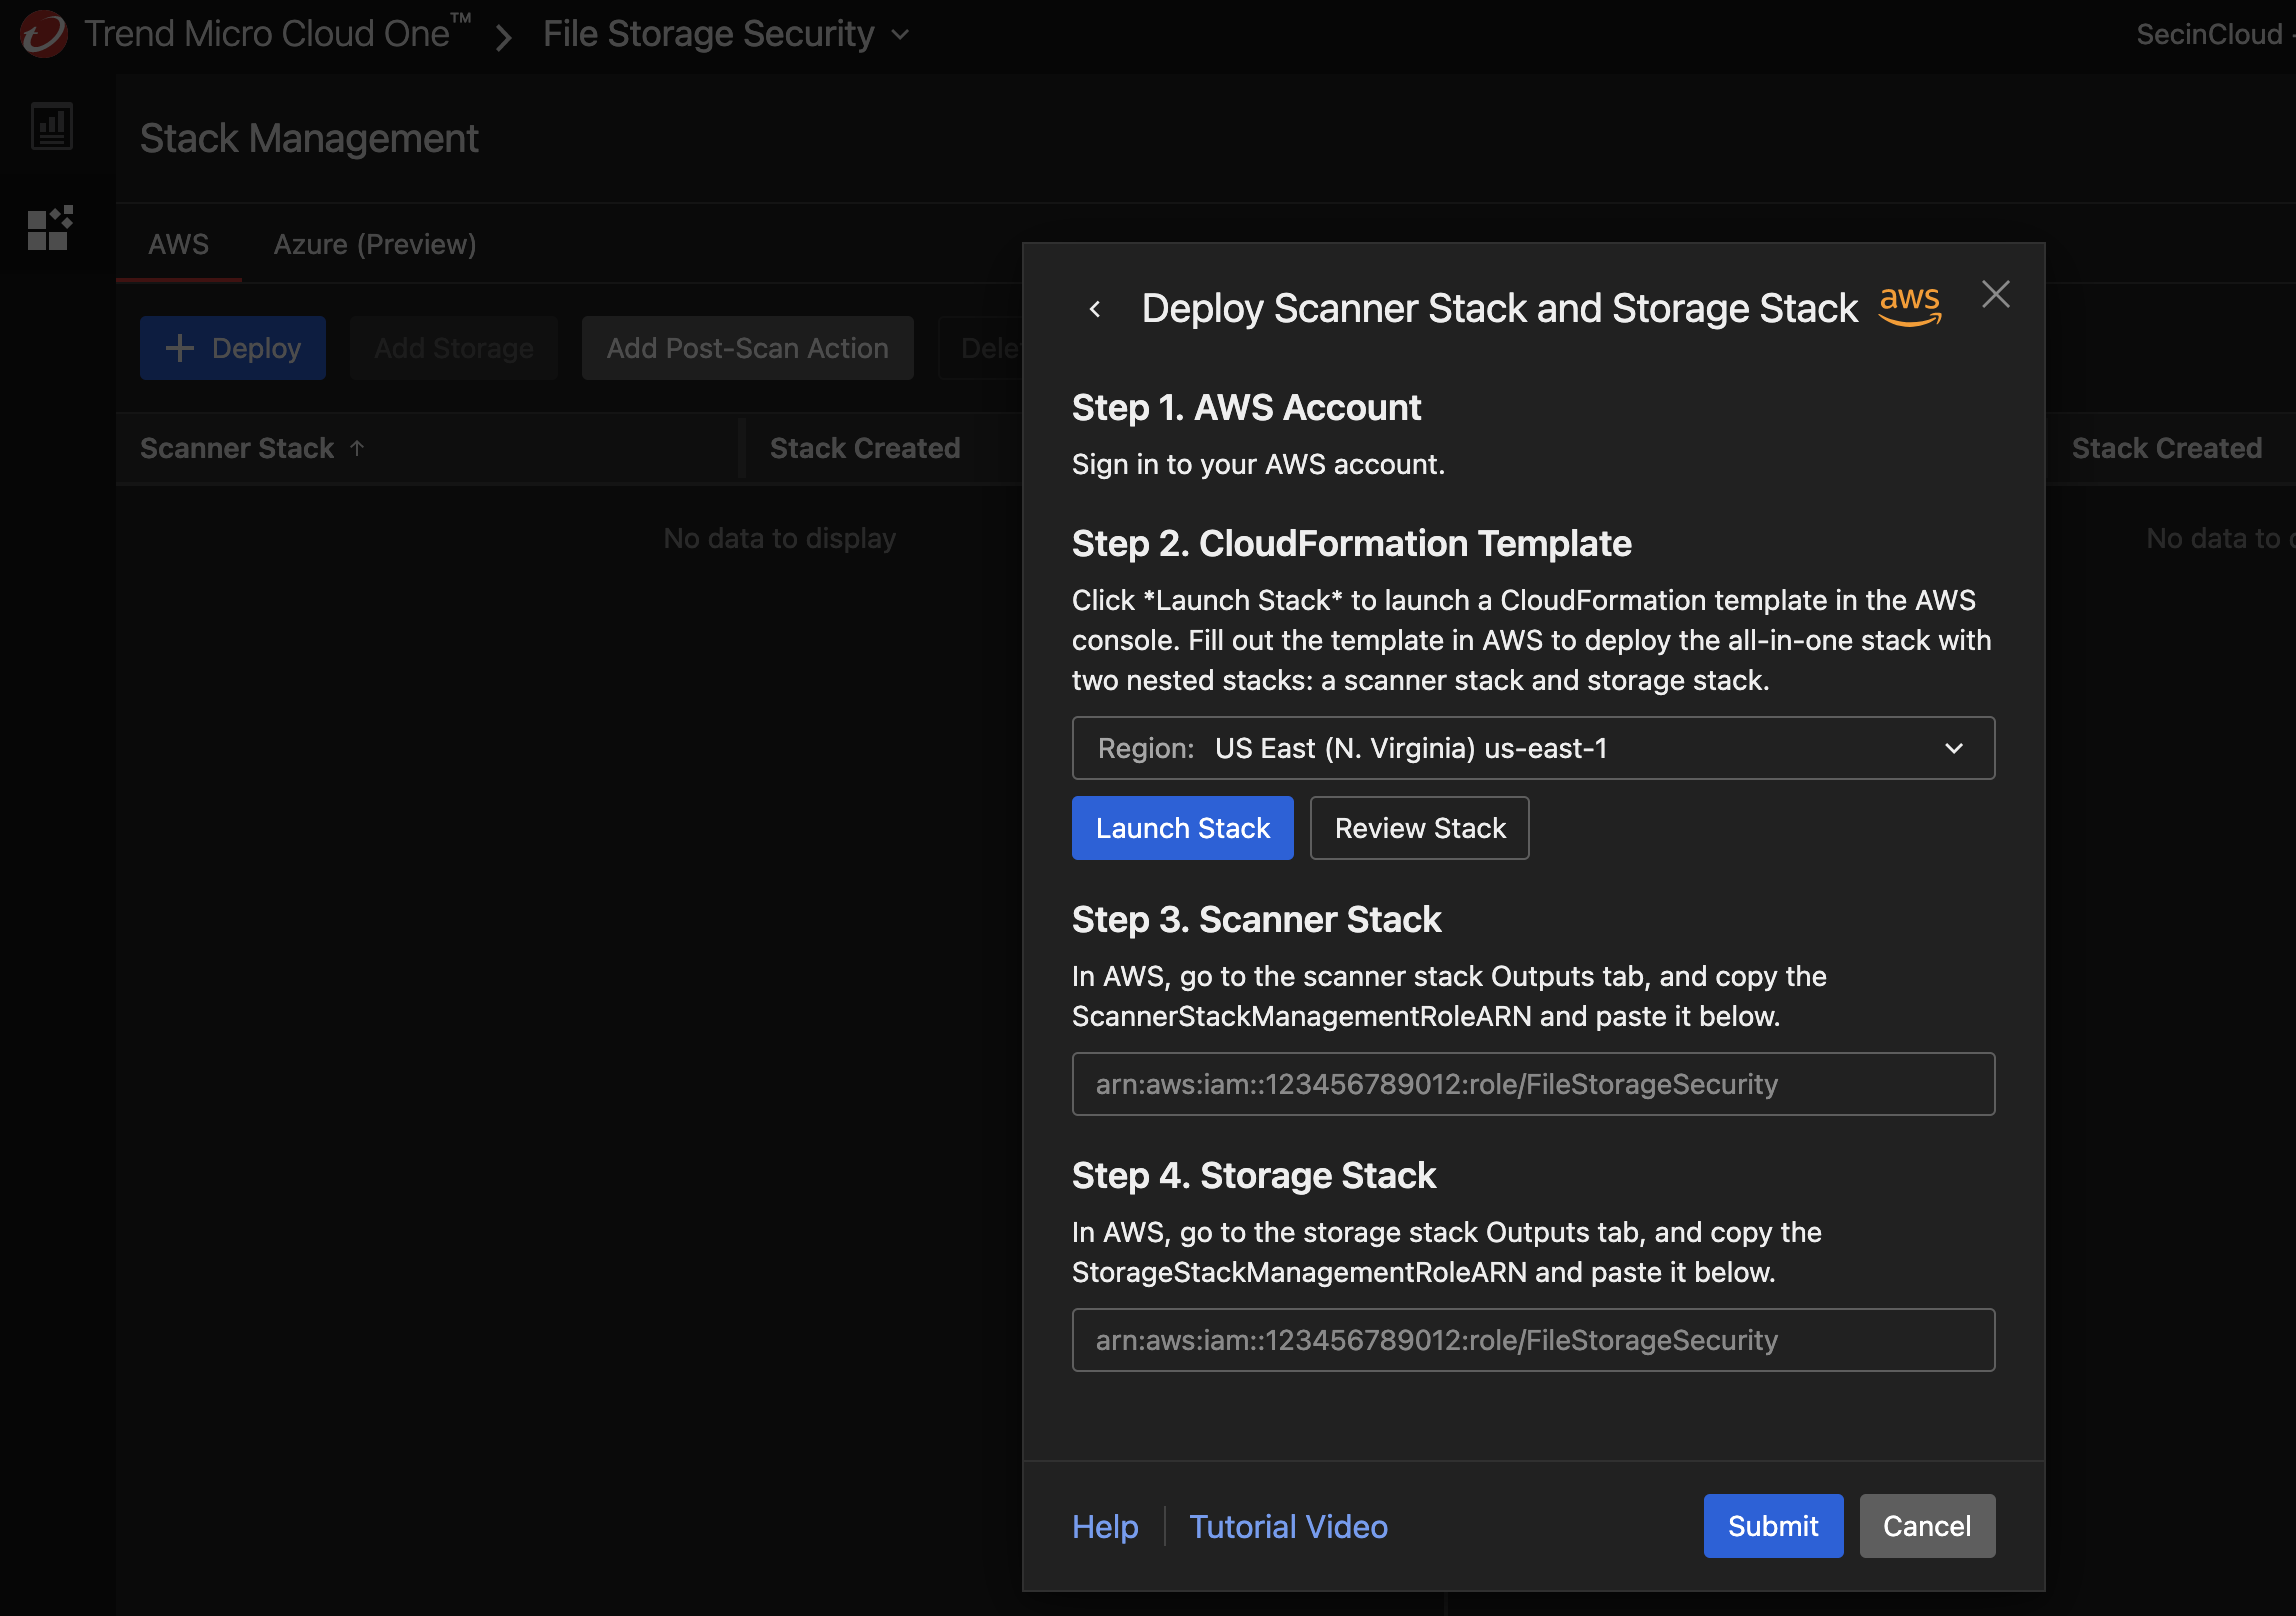
6. Select the AWS region that the CloudFormation stack named DataMigrationWorkshop-inCloudResources.
- The default selection is AWS region
us-east-1. - Click on Launch Stack.
This will redirect you to your AWS account in the region that you choose to deploy the stack. Make sure that you’re logged in and have the correct permissions – you can check the details of the permissions required in the Requirements section.
Try to make sure the Cloud One console tab is in the same Window as your browser. This way, the Launch Stack will automatically use the AWS session that you have open already.
You can validate the CloudFormation Template by clicking in Review Stack. To make it easier, you can also verify the CloudFormation Template by clicking the buttons below:
All in One Template Scanner Stack Storage Stack
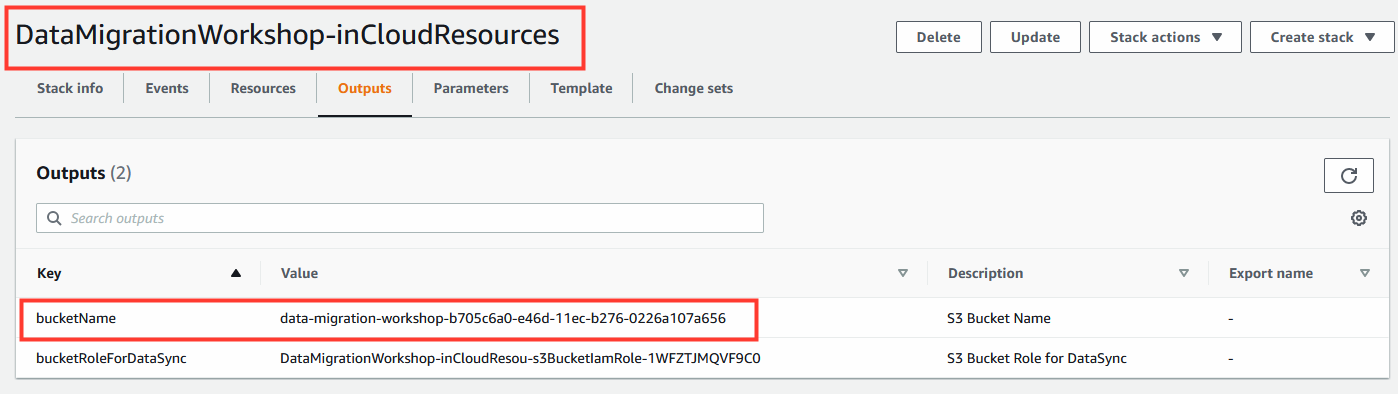
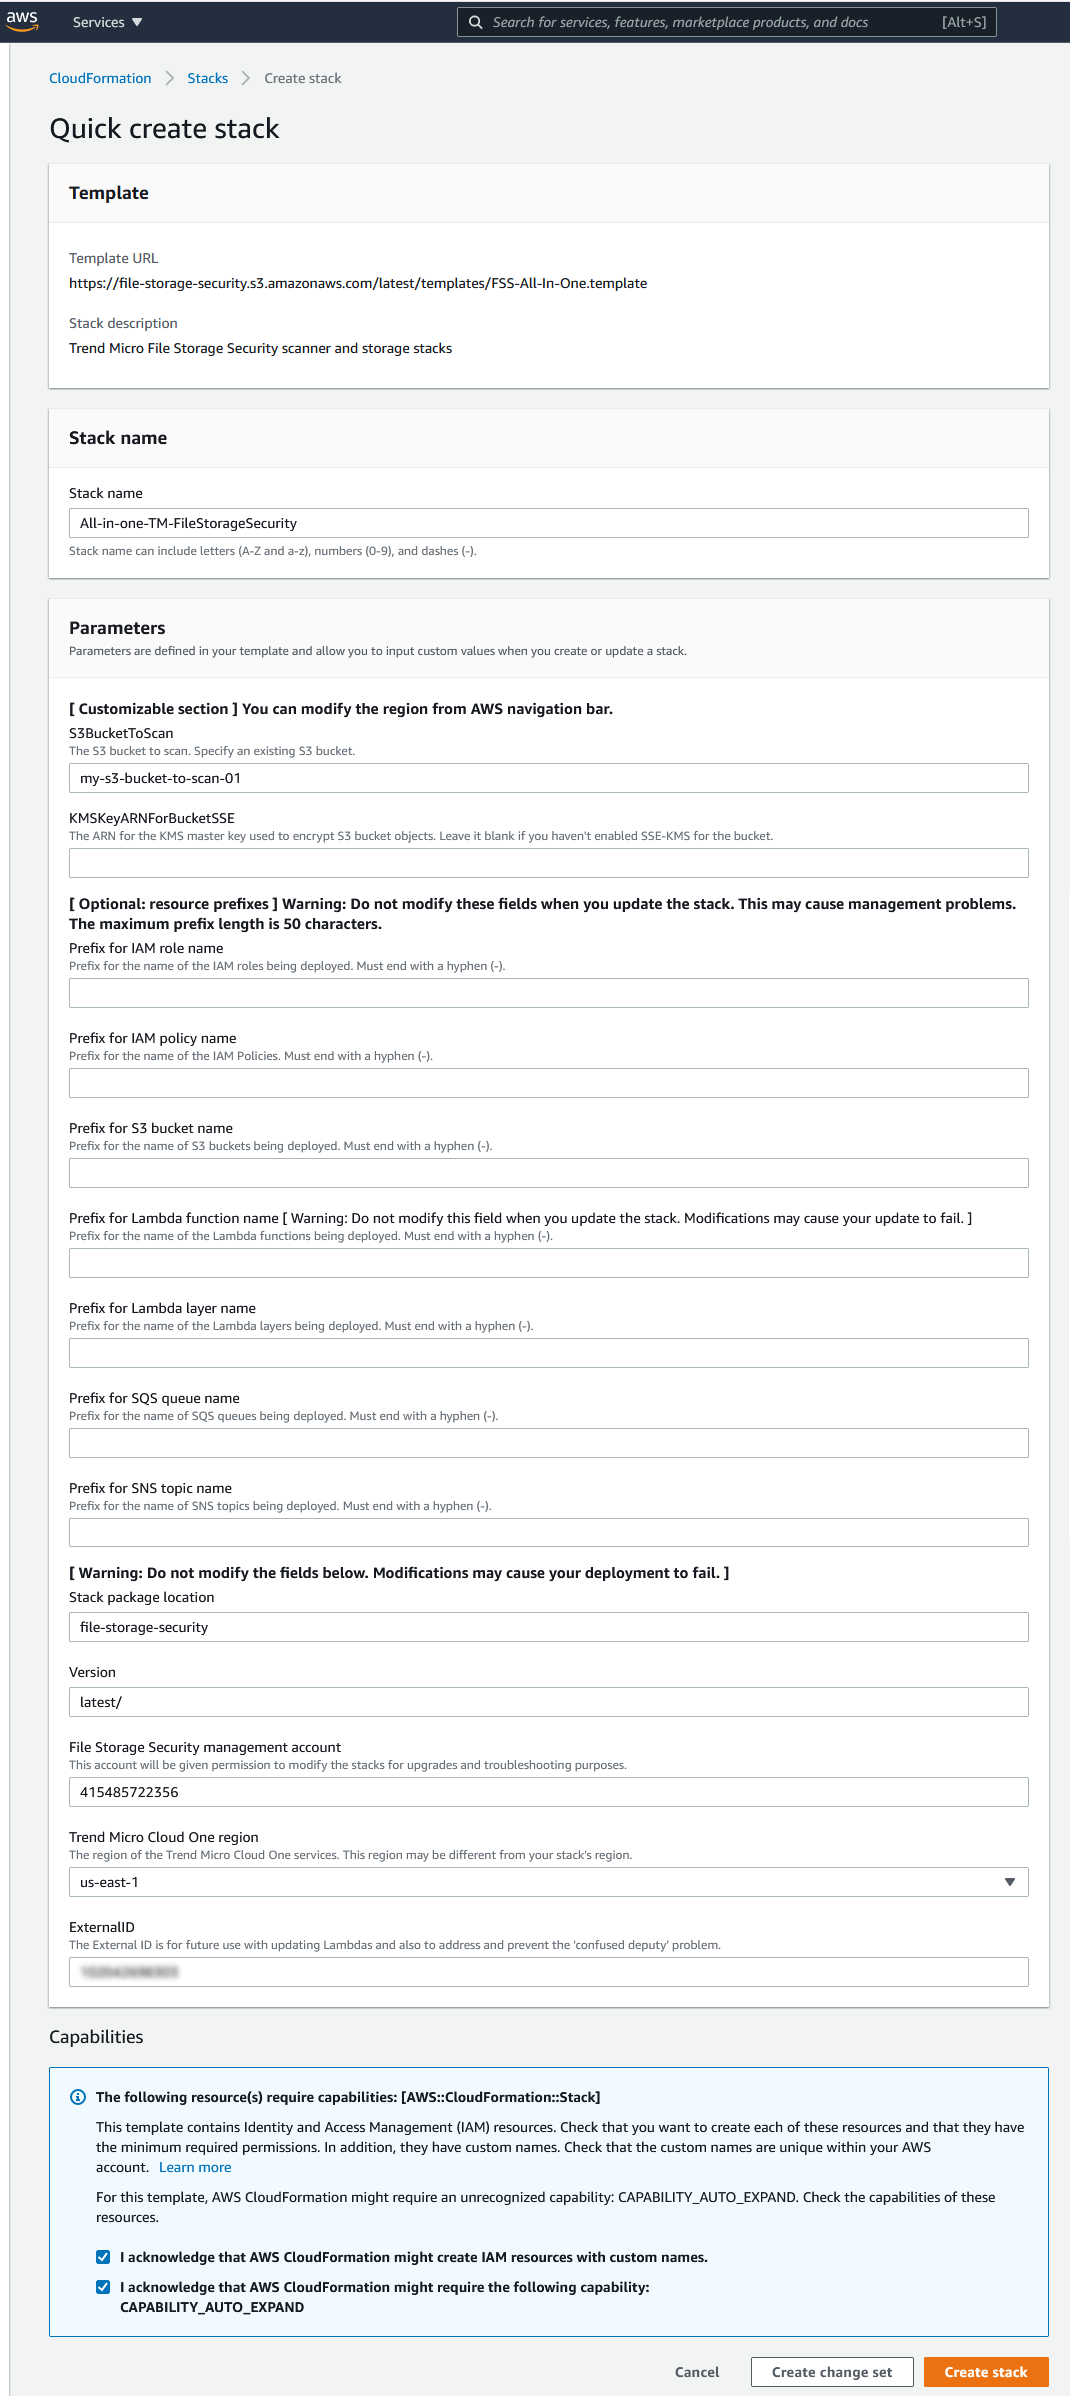
7. In the CloudFormation page the only required parameter here is the name of the bucket that was created in the template stack named DataMigrationWorkshop-inCloudResources.
- To find the bucket name check the cloudformation template outputs section as shown below.
-
It also supports different parameters to customize your installation, like Resource prefixes and optional KMS integration. For more details about these configurations check our Documentation.
-
After adding the bucket name you will need to acknowledge and click on "Create Stack"
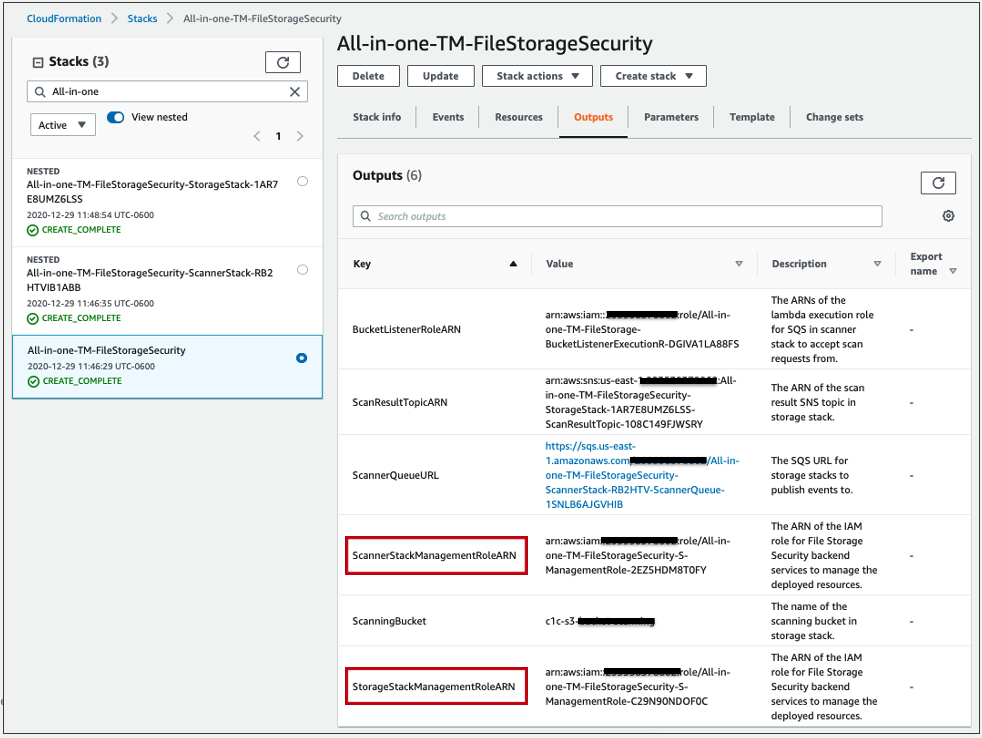
8. After deploying the all-in-one stack in your AWS account, you must configure the scanner and storage stack Amazon Resource Names (ARNs) information in the Cloud One console. The ARNs map a scanner stack to a storage stack, allowing them to be aware of each other.
Go to CloudFormation > Stacks > your all-in-one stack > Outputs tab and copy the Values with these Key names here ScannerStackManagementRoleARN and StorageStackManagementRoleARN and paste the information into the Cloud One - File Storage Security console.
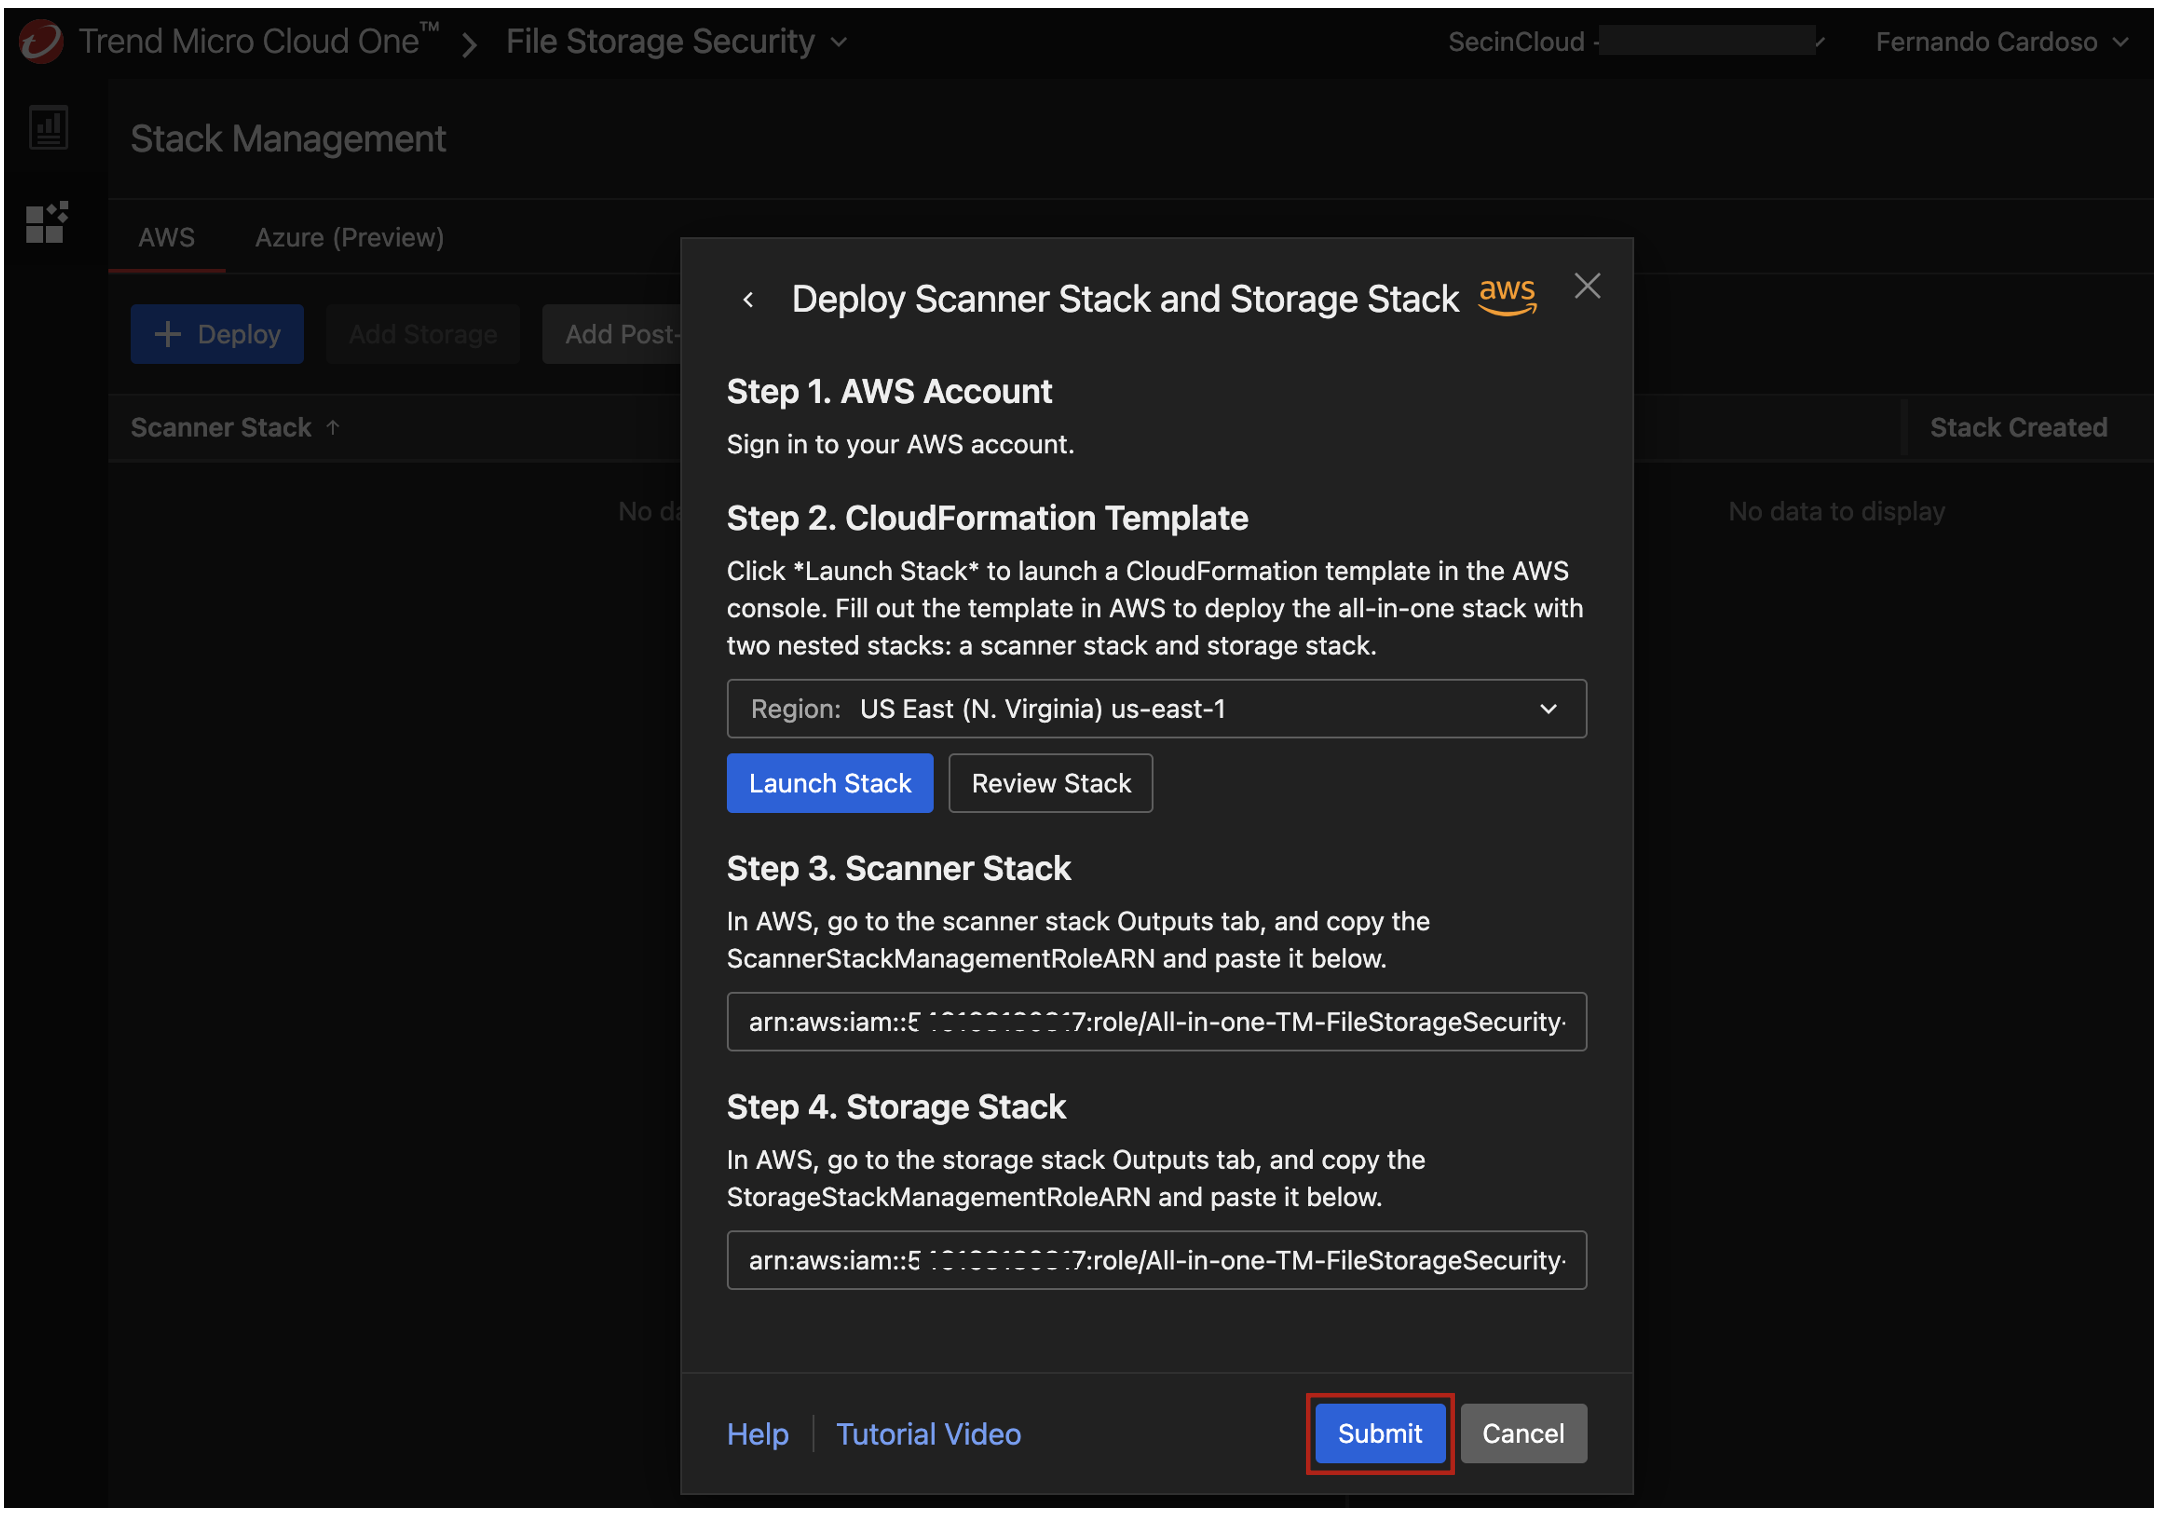
9. Then Click Submit. You see a couple of success messages at the bottom and the stack will show in the Stack Management too.
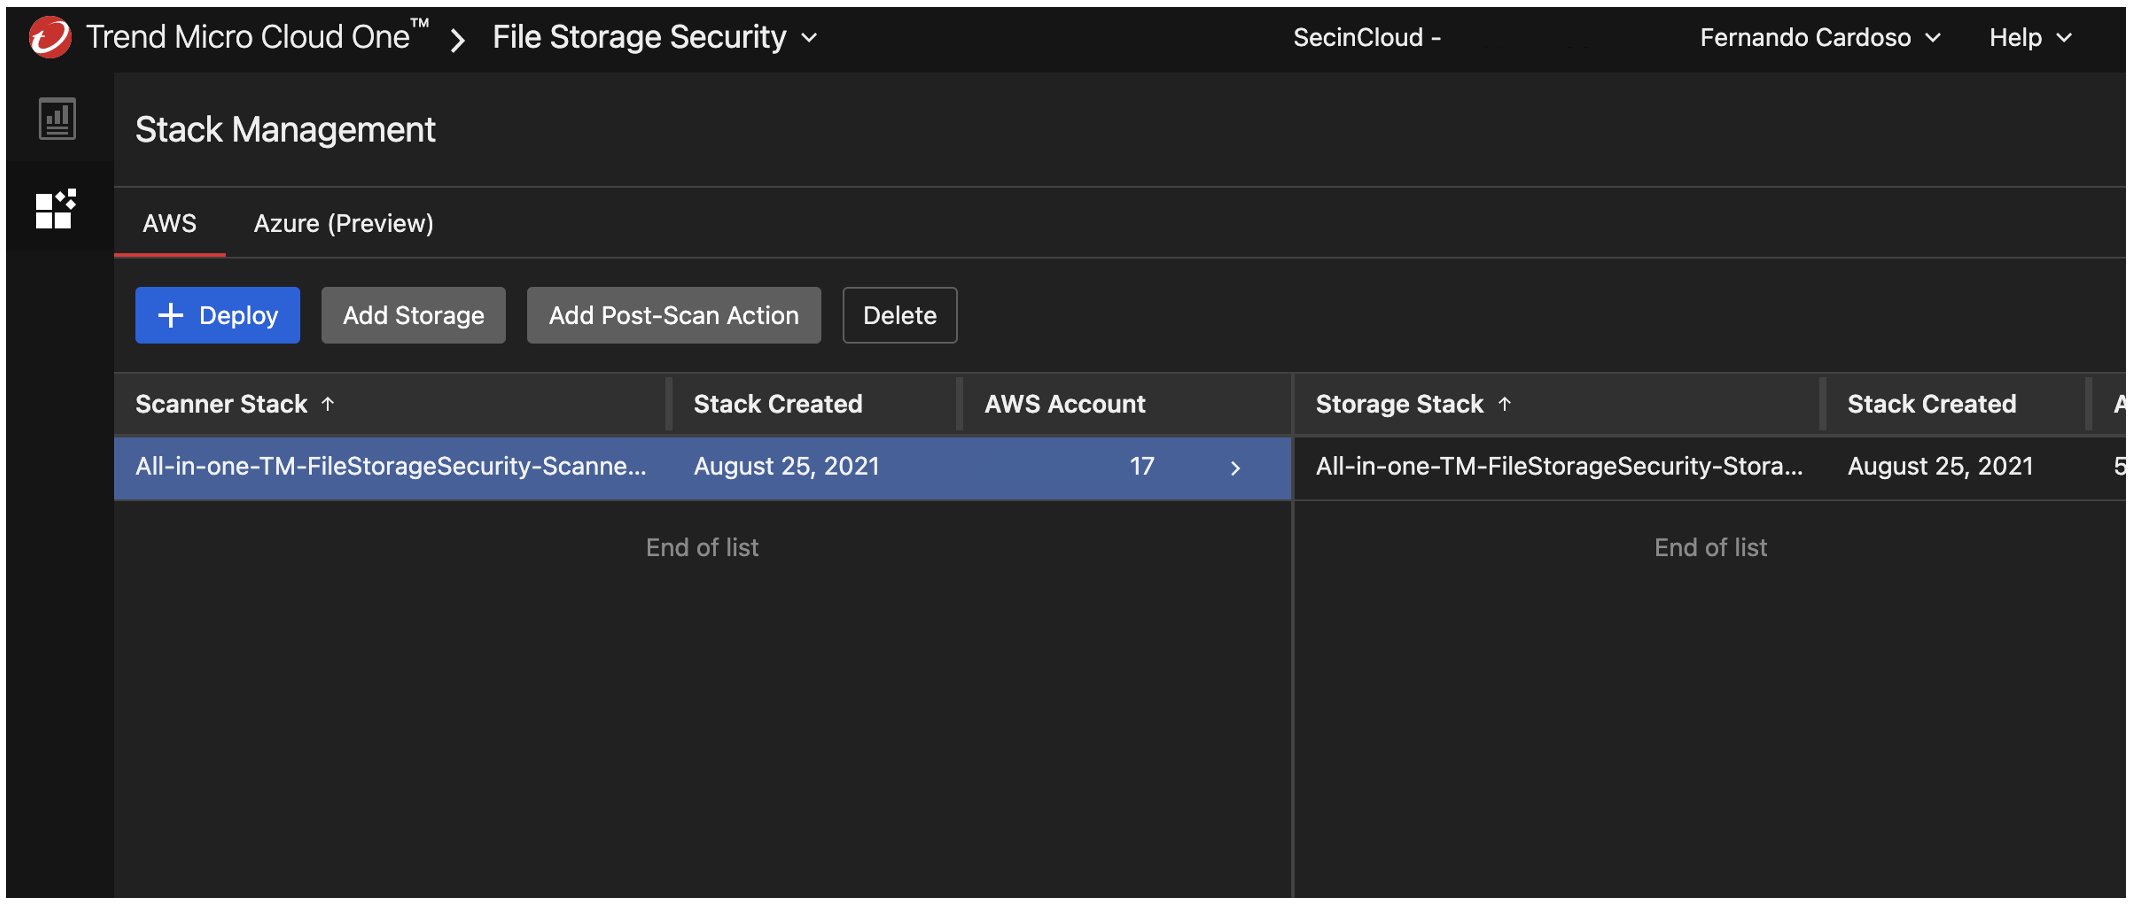
You have now completed the deployment of the All-in-One stack 🎉, so let’s test our deployment.
All the new objects that will be uploaded to your bucket that you define will now automatically be scanned against malware and tagged as either “malicious” or “no issues found”.
Here is a video with the steps to deploy All-in-One stack for File Storage Security: